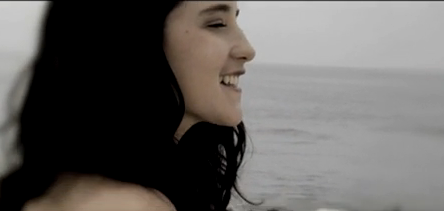
I used this design to inspire me to use a selection of small photos of our artist. I think this idea gives the impression of exclusivity to the audience as they gain an insight into the artists performances and life. I believe this is an advantage, as showing both the actual album cover plus additional photos of the artist would boost sales.
Leopard Blog Search
Showing posts with label Planning. Show all posts
Tuesday, 30 November 2010
Final Magazine Advert
Monday, 29 November 2010
Final Digipack Design
Here is the design for our final Digipack design for the front, back Cover inlay and the cd design itself. We have used a neutral tone for teh background which relates to the natural location in which where we filmed our footage.
Thursday, 25 November 2010
Convention Images from our video
Costume - link with The Kooks 'She moves in her own way'
Saturation - Oasis 'Little by little'
Location - country and western style - The Kooks 'She moves in her own way'
Being just two people in the video - Link with Jason Mraz 'Lucky'
Hidden identity - Katy Perry 'Hot N Cold'
Performance element - Jason Mraz 'I'm Yours'
Convention Images
Jason Mraz 'I'm Yours'
Katy Perry 'Hot N Cold'
Both Jason Mraz 'Lucky'
Oasis 'Little by little'
Both The Kooks 'She moves in her own way'
Tuesday, 23 November 2010
Digipack - Paolo Nutini

I think this cover of Paolo Nutini is very similar to the look we would like our artist Nick Rivers (Joe) to have. In earlier planning and reserach stages I used Paolo Nutini to help me with star image. After seeing that he goes for a casual look, wearing jeans and shirts we dressed Joe in that style. In our video we also used black and white clips to symbolise his past with his girlfriend, so it would be effective to carry the theme through and consistently use intertextuality. I will use this digipack cover to help inspire me with my own.
Thursday, 18 November 2010
Digipack Production
I have decided to do some research into digipack production and how this has developed with now public access to online programmes. I looked at various sites which allow the public to create their own digipack which makes the process much more accessable for indie bands.
This is Pack Smart Inc which is an online site explainng how digipacks are created in mass production.
http://en.wikipedia.org/wiki/Digipak
I also researched the history of digipacks and how they have developed over time to become a key aspect in the music market. This is a company called "didgipak icreate" which is a slightly more professional programme which was set up by AGI aimed at web consumers to download music and photos for the creative market.
Information from: http://en.wikipedia.org/wiki/Digipak
Tuesday, 16 November 2010
Digipack Template
Here is a template with 6 places. Here we could use 5 images aswell as the CD. We are now planning on designing the actual CD aswell as we think it would make our Digipack more professional.
Artist Images Similar To Ours
Here is an image of Joshua Radin. When researching into Digipacks and artist images I was recommended to have a look at him. In the image above he is pictured with his guitar, which is very similar to our artist Joe.
After seeing the image of Joshua Radin in black and white I will consider some of our Digipack images being in black and white also.
Here is the front album cover of Joshua Radin. I really like the way the photo is in black and white with only the bucket and spade in colour. I will consider using this effect when designing our Digipack.
Digipack Image Ideas - 16/11/10
We need 6 images for our Digipack so, I went onto Final Cut Express and took screen grabs from our music video so that the intertexuality is consistent. Hannah and I will now look through these and photos from filming sessions and decide what ones we would like to edit on Photoshop for our final Digipack.
Monday, 15 November 2010
Song Title Ideas
Today I have been thinking more on Digipack ideas, and what images and titles I could use. So, I went on to the actual artist of our song's myspace and looked at their song titles.
They are:
They are:
- If You
- Finding The Courage
- Get Along
- The Boiler Room
Friday, 12 November 2010
Editing Day Screen shots
On 11 November we had a whole day off timetable to edit our videos to make progress. In previous lessons we had already cut out which parts of clips that we wanted to use and used these when editing the real video. As we went along, cutting the footage we tried to put a variety of transitions in and we found out how to do this by looking up tutorials on the internet. We mangaed to edited over half of our music video which we found very preogressive and hope to edit the last part of it over the next week or so.
Our Editing Day - 11/11/2010
Yesterday we had a day off timetable to edit our rough cut of our music video. From previous lessons and during the day Hannah and I watched tutorials to help us improve our skills and the video itself. We decided to zoom in on a clip to highlight Joe lip syncing. We did this by double clicking on the actual clip so that it appeared in the viewer. We then clicked on 'motion' and changed the scale from 100 to 150.
This was the outcome :
We also used different transitions. The one we most commonly used was 'cross dissolve', as it helped to smooth the transitions and made the video flow much more easily. We also used a 'non addictive' dissolve which softened the clip of our artist Joe walking, to the clip of him singing on the hay bale. Later on we again used the technique of zooming into a particular clip to get a better view of Joe, this was the clip where Joe was sitting on the bridge. We wanted to again emphasise the lip syncing. There is also a clip of Joe on his phone, I moved the clip slightly which improved it greatly as the trees surrounding him then framed the shot.
As Hannah and I are a group of two I feel slightly at a disadvantage. We still need to complete our editing but we did manage to get up to our a minute and a half with only the two of us working on it and adding transitions and close ups as we went along. We have roughly a minute left to edit and will complete this in our own time.
This was the outcome :
We also used different transitions. The one we most commonly used was 'cross dissolve', as it helped to smooth the transitions and made the video flow much more easily. We also used a 'non addictive' dissolve which softened the clip of our artist Joe walking, to the clip of him singing on the hay bale. Later on we again used the technique of zooming into a particular clip to get a better view of Joe, this was the clip where Joe was sitting on the bridge. We wanted to again emphasise the lip syncing. There is also a clip of Joe on his phone, I moved the clip slightly which improved it greatly as the trees surrounding him then framed the shot.
Wednesday, 10 November 2010
Progress Update
We are now in the process of editing to get our final music video finished. We have been going through all our previously filmed rough cuts and deciding what clips fit best. We are currently editing the beginning of the music video and have cut down 3 clips and fitted them to the beat. We are now working on the first section of lip sycning where we have used two different clips and put them together to get the first chorus. We have been watching online tutorials so that we can move forward and improve our skills. We have learnt to change the speed of the clips. We needed to do this at the beginning of our video because our artist Joe was strumming the guitar slightly too slowly, so we increased the speed to fit it with the sound. We have also added three cross disolves. The transitions now flow much better which has improved the beginning of our music video greatly. We have our off timetable editing day tomorrow where I believe we will make much more progress and will be near to having a rough draft of our finished music video. We previously decided to film more clips of our artist Joe's girlfriend (which is me), so Hannah and I did this on Monday. We have yet to upload the footage but I believe this will improve the narrative of our music video. Another advantage of having these extra clips means that we will have more clips to work with and a variety to use, and this will make it more interesting for the audience.
Tuesday, 9 November 2010
Editing Process
Now that we have started our editing process we have needed look for help on transitions as we think that our song doesn't look right with block cut changes. We have managed to include cross dissolves and fades to merge some of our shots together using online tutorials to help us to do this.
Music Video Production
Today I signed up to a website which is specifically designed for designing music videos and comes up with hints and tips on how to create a really great finished product.
http://www.videomaker.com/article/14586/
Sunday, 7 November 2010
Music Video Conventions
In our music video we have used many video conventions concerning camera shots, camera movement, editing, lighting and Mise-En-Scene.
For camera shots we have included a variety of long shots, mid shots and extreame close ups to create variation throughout the video. The main generic convention we have used thorughout the music video are close ups on the artists face while lip syching. Concerning camera movement we have used a variety of techniques including panning, mainly used to follow the artists movement. Editing, we can comment on the fast cutting rate to associate well with the upbeat tempo of the song. We have recognized this as the beat and rhythm of the song determines the editing techniques. Lighting in music videos can be seen as very important and extreame artificial lighting is usually used to emphasize the artist and making them look flawless.Switching from black and white light indicates the shift from verse to chorus although in our peice we hope to use black and white shots to show that those particular shots are memories. The overall layout and aesthetics of the video determines the style of the video. We have shown this by the clothes and location as they are both quite relaxed and a casual approach to the video as a whole.
Friday, 5 November 2010
Adaptations To Filming
In today's lesson we started to put our shots together to the beginning part of the song, although we have decided to include black and white shots throughout the video we also found out that other effects would look good with our type of video. We used techniques such as the fade in fade out tool to vary the shot transitions. We finally settled on the cross disolve effect which merges the two shots together while disolving out.

The colouring on the left shows how most of the video will be shown, however the colour saturation change shown at the bottom will show what the flashbacks will look like when he was with his girlfriend, although there won't be many shots of this throughout the video as most of the focus we want to make is on the artist.
We have edited this photo in photoshop although we are aware that we will have to change this through final cut express.

The colouring on the left shows how most of the video will be shown, however the colour saturation change shown at the bottom will show what the flashbacks will look like when he was with his girlfriend, although there won't be many shots of this throughout the video as most of the focus we want to make is on the artist.
We have edited this photo in photoshop although we are aware that we will have to change this through final cut express.
Subscribe to:
Posts (Atom)